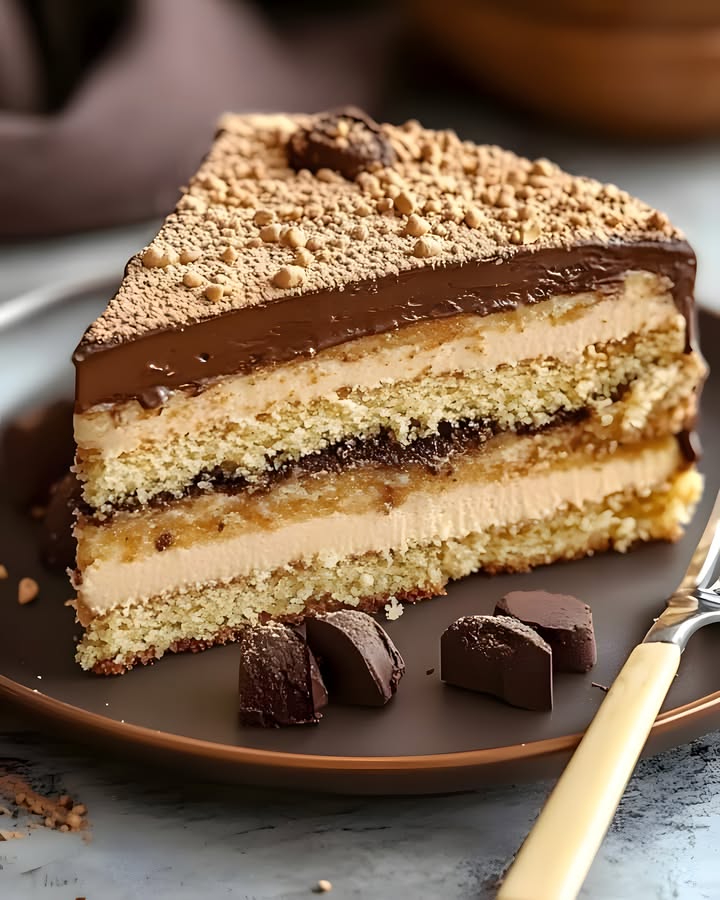
Kiev Cake Recipe
Kiev Cake Recipe
Introduction
The Kiev Cake is a delightful dessert that hails from Ukraine. It features layers of meringue, crunchy nuts, and creamy custard, making it a dream for dessert lovers.
Why Make This Recipe
This cake is perfect for special occasions or just a weekend treat. Its unique texture and rich flavors will wow your family and friends. Once you try it, you’ll want to make it again and again!
How to Make Kiev Cake
Ingredients:
- 12 egg whites
- 2.5 cups sugar
- 7 oz (200 g) cashews, coarsely chopped
- 5 oz (140 g) peanuts, coarsely chopped
- 3/4 cup flour
- 1 tsp vanilla extract
- 12 egg yolks
- 2 cups milk
- 1.5 cups sugar
- 1 lb (450 g) butter, softened
- 2 Tbsp cognac (optional)
- 2 Tbsp cocoa powder
- 1 cup chocolate chips
- 4 Tbsp oil (vegetable or sunflower oil)
Directions:
Day 1: Meringue Layers
- In a large mixing bowl, beat the egg whites until foamy.
- Gradually add the sugar and vanilla extract while mixing, and continue to beat until stiff peaks form.
Prepare the Nut Mixture
- In a separate bowl, mix the chopped cashews, peanuts, and flour.
- Gently fold the nut mixture into the beaten egg whites using a silicone spatula until well combined.
Bake the Meringue Layers
- Line two 10-inch round cake pans with parchment paper.
- Divide the meringue mixture evenly between the two pans.
- Bake in a preheated oven at 300°F (150°C) for 1 hour and 45 minutes. Once baked, allow the meringue layers to cool on wire racks. Leave them to set overnight.
Prepare the Custard
- In a medium saucepan, bring the milk and sugar to a boil over medium heat.
- In a separate bowl, slightly whisk the egg yolks.
- Temper the egg yolks by adding a small amount of the boiling milk mixture to them while stirring.
- Gradually pour the tempered yolks back into the boiling milk, stirring continuously until the mixture thickens and comes to a boil.
- Remove from heat, cover, and allow it to cool completely. Refrigerate the custard overnight.
Day 2: Buttercream and Assembly
Make the Buttercream
- In a large mixing bowl, beat the softened butter until creamy.
- Gradually add the cooled custard cream to the butter while continuing to beat until smooth and well combined.
- Add the cognac (optional) and beat again.
Assemble the Cake
- Remove the meringue layers from the pans and peel off the parchment paper.
- Place the first meringue layer onto a serving plate and fit a springform ring around it.
- Spread 3/4 of the buttercream evenly over the first layer.
- Place the second meringue layer on top, inverted so that the bottom of the second layer becomes the top of the cake.
- Add the cocoa powder to the remaining buttercream, mix well, and spread it over the top layer of the cake.
- Refrigerate the assembled cake for several hours or overnight to set.
Chocolate Glaze
Make the Glaze
- In a microwave-safe bowl, combine the chocolate chips and oil.
- Microwave for 1 minute, then stir until the chocolate is fully melted and smooth.
Glaze the Cake
- Once the cake is set, remove the springform ring and pour the chocolate glaze over the top, allowing it to drip down the sides for a smooth, glossy finish.
Serving Suggestions
Let the cake chill for a few hours before slicing. Enjoy the perfect combination of crunchy, chewy meringue, rich buttercream, and chocolate glaze!
How to Serve Kiev Cake
Serve slices of Kiev Cake chilled for the best taste. Pair it with a cup of coffee or tea for a delightful dessert experience.
How to Store Kiev Cake
Store any leftover cake in the refrigerator. Keep it covered to maintain its freshness. It can last for a few days but tastes best when enjoyed soon after making.
Tips to Make Kiev Cake
- Make sure to beat the egg whites until stiff peaks form for the best meringue texture.
- Allow the meringue layers to cool completely to prevent sogginess.
- Refrigerate the assembled cake overnight for the best flavor and texture.
Variation
You can add different nuts or even some fruit jam between the layers for a new twist on this classic cake.
FAQs
Q1: Can I make the meringue ahead of time?
A1: Yes, you can bake the meringue layers a day in advance and store them in an airtight container.
Q2: Is it okay to leave out the cognac?
A2: Absolutely! The cognac is optional and can be omitted if you prefer.
Q3: What can I use instead of chocolate for the glaze?
A3: You can use white chocolate for a different flavor or a simple sugar glaze if you prefer.